The Best Fluffy Pancakes recipe you will fall in love with. Full of tips and tricks to help you make the best pancakes.

Please follow and like us:
Imagine biting into a perfectly baked pizza crust, topped with seasoned ground chicken, melted mozzarella, and slices of crisp capsicum. Our ground chicken pizza recipe brings all these elements together for a mouth-watering experience. Ideal for any occasion, this pizza is not only delicious but also easy to make.
Step-by-step, we’ll walk you through the process, from preparing your chosen crust to adding the final cheese layer, ensuring you get flawless results every time.
Ingredients for Homemade Chicken Pizza
For the Pizza Dough
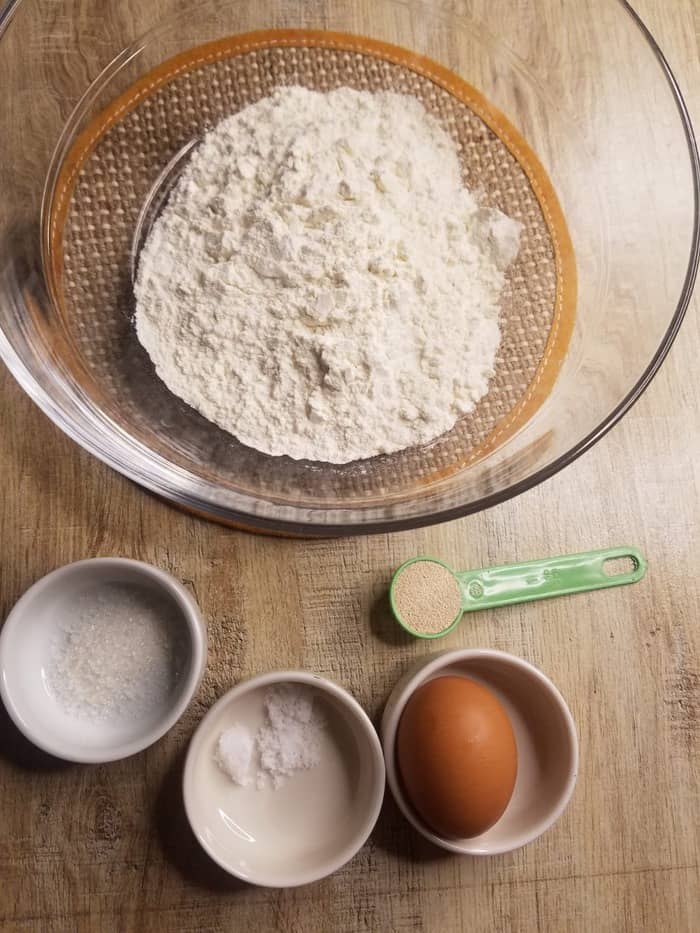
- 1 1/2 cups plain flour
- 1 teaspoon instant yeast
- Warm water (as needed for dough consistency)
- 1/2 teaspoon salt
- 1/2 teaspoon sugar
- 1/2 beaten egg
- 2 tablespoons vegetable oil
For the Pizza Sauce
- 1/2 kg fresh red tomatoes
- 1 tablespoon tomato sauce
- 1/2 teaspoon black pepper powder
- 1 teaspoon chili flakes
- 1 teaspoon salt
- 1 teaspoon sugar
- 1/2 teaspoon paprika powder
For the Chicken
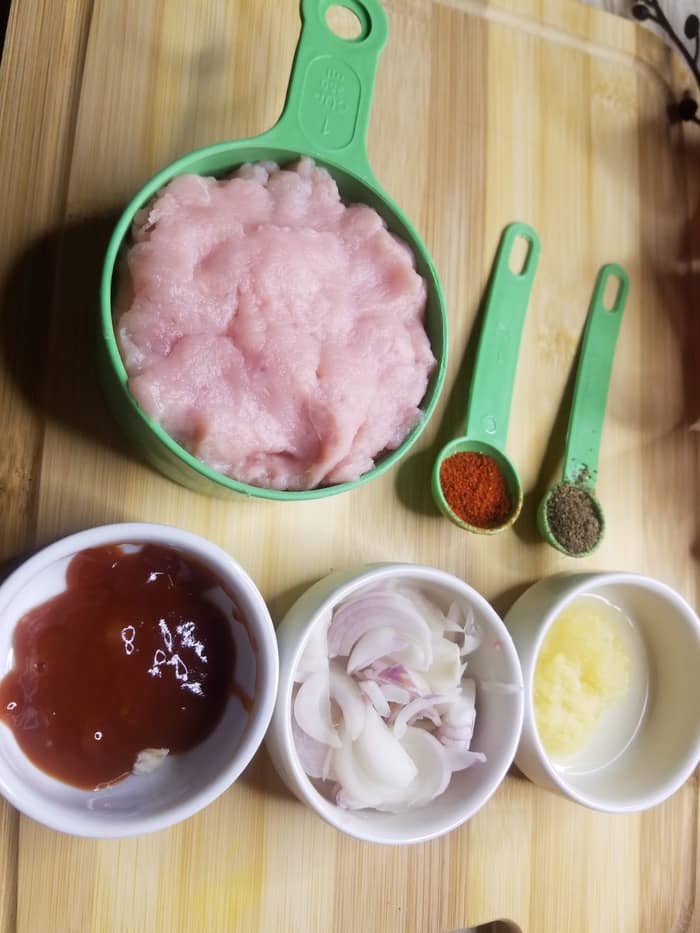
- 1 cup ground chicken
- 1/4 cup sliced onions
- 1/2 teaspoon garlic paste
- 1/2 teaspoon ginger paste
- 1/2 teaspoon black pepper powder
- 1/2 teaspoon paprika powder
- 1 teaspoon tomato sauce
- 1/2 cup water
Toppings
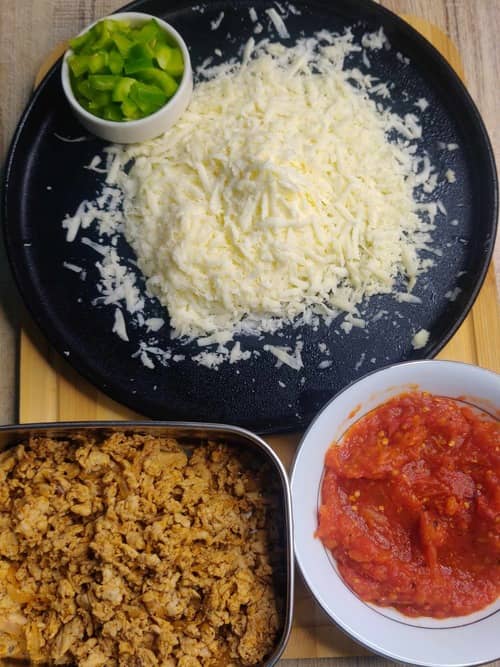
- Cooked ground chicken
- Mozzarella cheese, shredded
- Capsicum, sliced
- Optional toppings: additional onions, olives, etc.
Preparation Method (Step Wise Guide)
Step 1: Prepare the Pizza Dough
First, let’s get our pizza dough ready. In a large mixing bowl, I combine all the dry ingredients: 1 1/2 cups of plain flour, 1 teaspoon of instant yeast (I prefer using instant yeast for quicker rise times), 1/2 teaspoon of salt, and 1/2 teaspoon of sugar. I mix these together until they’re well blended.
Next, I add 1 tablespoon of olive oil to the dry mixture. This helps to enrich the dough and give it a lovely, subtle flavor. After adding the oil, I mix it thoroughly to ensure that every bit of the flour is coated, creating a fine crumb texture.
Following the oil, I add in half of a beaten egg to the mixture. I stir it until the mixture starts to incorporate the egg evenly. Now, it’s time to gradually add warm water. I do this slowly, mixing continuously, so that the dough begins to form without becoming too wet. I knead the mixture in the bowl until it becomes a soft, pliable dough.
Once the dough feels right, not too sticky and not too dry, I cover the bowl with a clean kitchen cloth and set it aside to rest for about 30 minutes. This resting period helps the gluten in the flour relax and makes the dough easier to handle later on.
After 30 minutes, I divide the dough into two equal parts. I give each part another good knead, adding a bit more flour if the dough is too sticky. I then cover both dough balls with a damp cloth and let them rise for 1 hour. This is where the instant yeast really does its magic, helping the dough to rise and develop great texture.
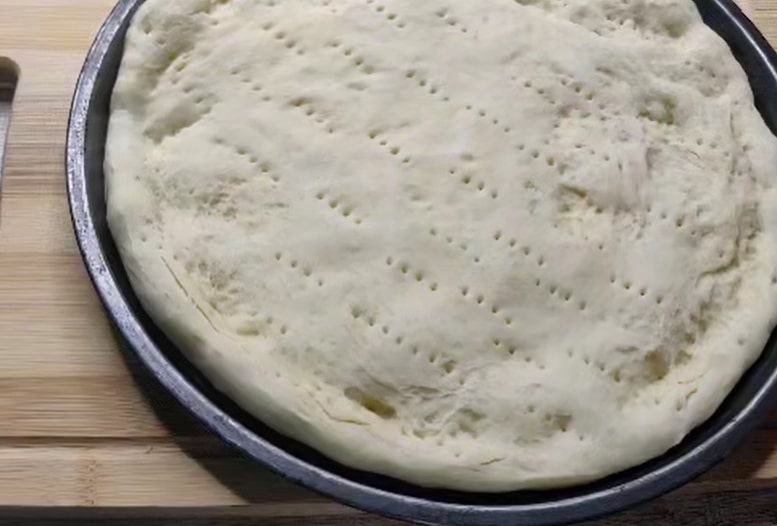
When the hour is up, I’m ready to shape the dough. I take my pizza pan and lightly grease it with some olive oil. Using my hands, I flatten one ball of dough directly in the pan. You can also use a rolling pin if you prefer a more uniform thickness. I work the dough out towards the edges of the pan until it’s evenly spread.
Before adding any toppings, I bake the dough alone. I preheat my oven to 180 degrees Celsius and slide the pan in. I bake the dough for 5-7 minutes just to get it started. This pre-baking ensures that our pizza crust will be perfectly crispy and able to hold all the delicious toppings without getting soggy.
Step 2: Prepare the Ground Chicken
- I start by adding a generous dollop of butter or a splash of oil to a pan set over medium heat. Once the butter melts or the oil shimmers, signaling it’s hot enough, I proceed to the next step.
- I then toss in the sliced onions. I love watching them sizzle and turn translucent—a clear sign they are perfectly sautéed, which usually takes about a minute.
- Next, I stir in the garlic-ginger paste along with a hearty pour of tomato sauce. This is when the aromas really start to build. I sprinkle in the black pepper powder, paprika powder, and a pinch of salt, giving everything a good mix. I let this cook for about 5 minutes, stirring occasionally to make sure all the flavors meld together beautifully.
- To bring it all together, I add just enough water to cover the bottom of the pan, which helps cook the chicken thoroughly and melds the spices into a cohesive mix. I let this simmer for about 10 minutes, or until the water has evaporated, leaving a rich, thick mixture. Before turning off the heat, I always taste it to see if it needs more seasoning—it’s crucial to get this base just right.
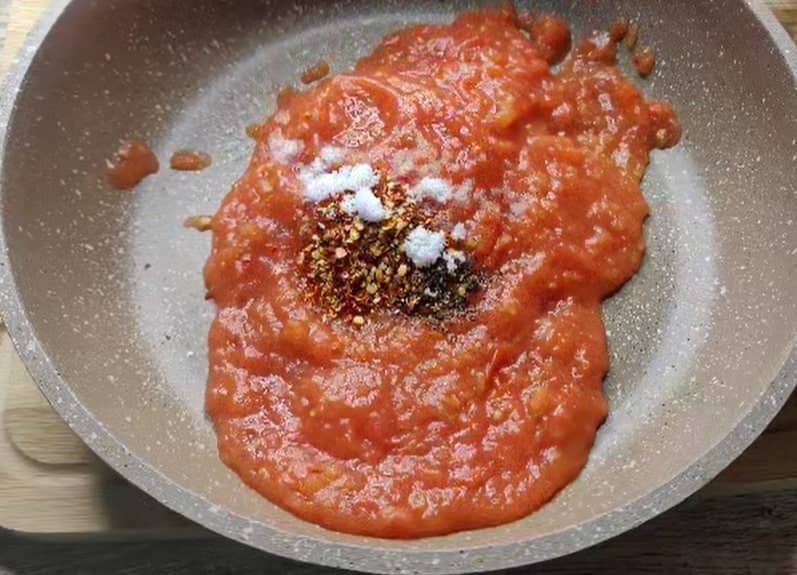
Step 3: Make the Pizza Sauce
- I begin with fresh red tomatoes, about half a kilogram, which I drop into boiling water. I let them boil for 5 minutes; this makes it easier to peel them later.
- Once boiled, I remove the tomatoes from the water and let them cool. Peeling them is oddly satisfying, revealing the soft, cooked flesh beneath the skin. I mash the tomatoes into a puree and strain any excess water to ensure my sauce isn’t too watery.
- I transfer the tomato puree back into a clean pan, adding a tablespoon of tomato sauce to deepen the flavor. I then sprinkle in black pepper powder, chili flakes for a bit of heat, salt to enhance the taste, a teaspoon of sugar to balance the acidity, and a touch of paprika powder for that subtle smokiness. I cook this mixture on medium heat until it thickens and reduces, stirring often to prevent any burning. It’s all about watching it transform into a rich, flavorful pizza sauce.
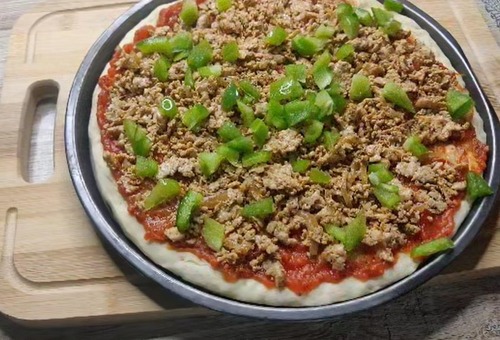
Step 4: Assemble the Pizza
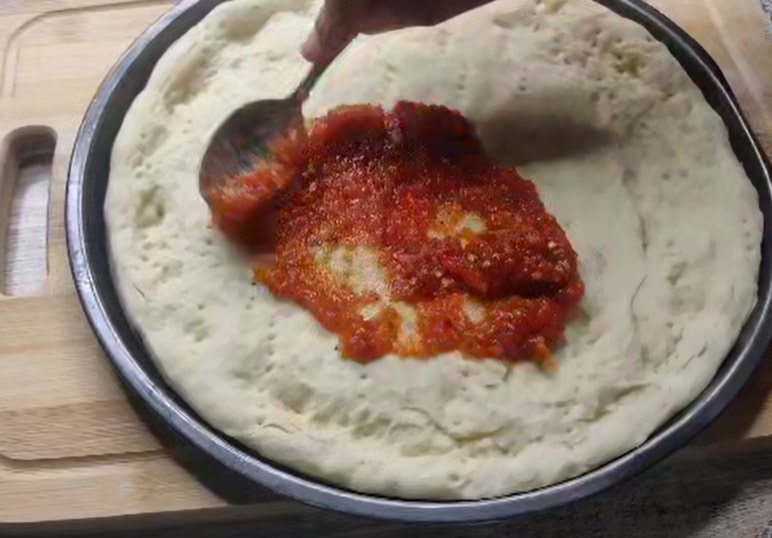
- Start by spreading a generous amount of the homemade pizza sauce evenly over the freshly prepared dough. It’s crucial not to skimp here; a well-sauced base makes for a juicy, flavorful pizza.
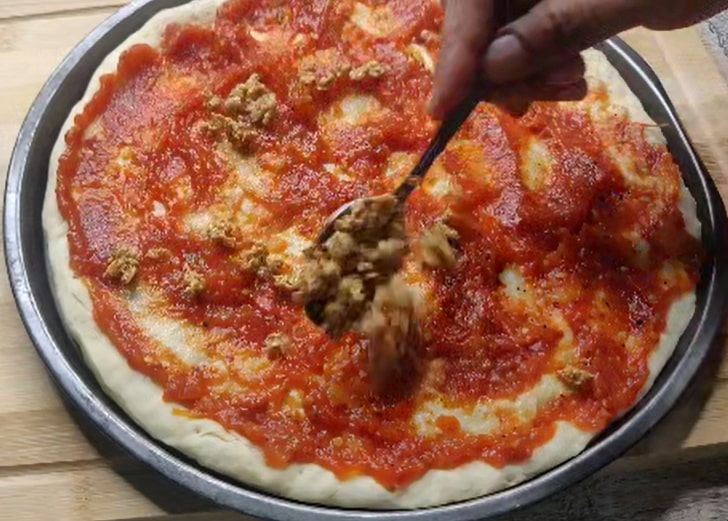
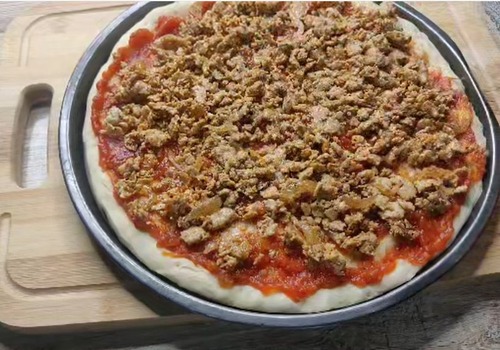
- Next, I evenly distribute the cooked ground chicken over the sauce. I make sure it’s spread out well so every bite has a good amount of chicken.
- After the chicken, I scatter slices of capsicum across the pizza. This not only adds a crunch but also a pop of color that makes the pizza visually appealing.
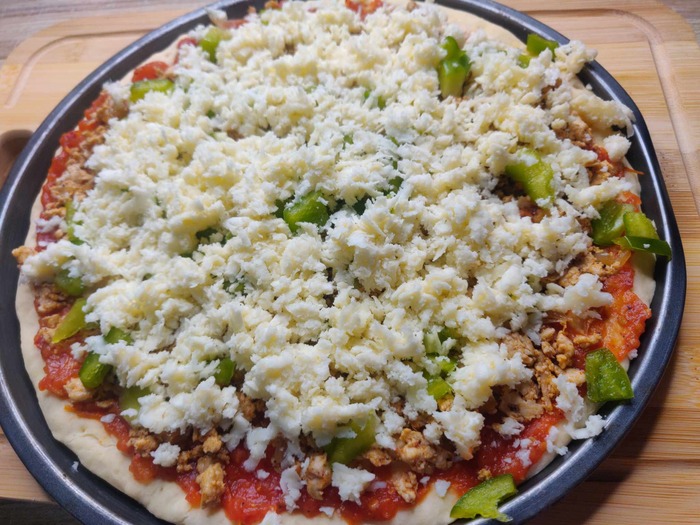
- Now comes the best part—the cheese. I generously cover the pizza with shredded mozzarella cheese, which will melt into a gooey, delicious layer. If I’m feeling adventurous, I sometimes add extra onions or a handful of olives at this stage for more complexity in flavor.
- This is where you can get creative and add any other toppings you love. Some great additions are sliced mushrooms, artichokes, or even a sprinkle of chili flakes for a bit of heat.
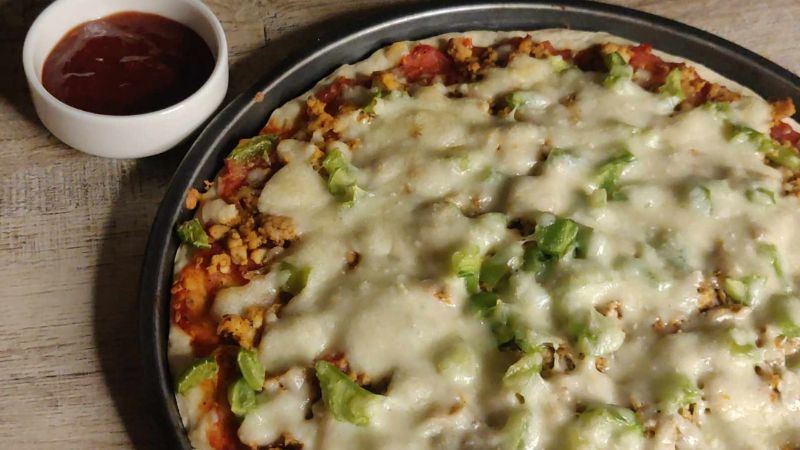
Step 5: Baking the Pizza
- I always preheat the oven to 180°C (356°F) before I start assembling the pizza. This ensures the oven is hot enough to immediately start cooking and crisping the crust when I slide the pizza in.
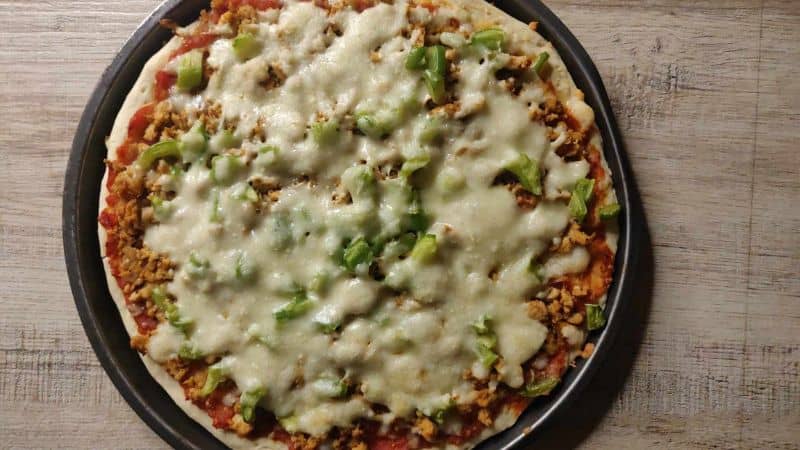
- I bake the pizza for 15-20 minutes. Watching the edges for a golden-brown hue and the cheese for that perfect bubbly, slightly browned appearance is key.
- For a crispy crust, I make sure to use a preheated pizza stone or a heavy-duty baking sheet. Placing the sheet or stone in the oven as it preheats gives it a head start on heat absorption, resulting in a beautifully crisp bottom.
- To ensure that all the toppings cook evenly, I try not to overload the center of the pizza. Keeping the toppings spread out evenly helps every piece cook at the same rate.
Cooking Tips for Ground Chicken
1. Season Well: Seasoning the ground chicken properly is crucial for flavor. Don’t hesitate to taste your chicken mixture (before adding raw chicken) to adjust the seasonings. After cooking, you can also tweak the seasoning if needed. Remember, the chicken will be one of the primary flavors on your pizza, so you want it to stand out.
2. Avoid Overcooking: Ground chicken can become dry if overcooked. To prevent this, cook it just until it’s no longer pink and the water has mostly evaporated. This ensures it remains moist and tender once baked on the pizza.
3. Use High Heat: Cooking the chicken on a higher heat can help it develop a nice color and more complex flavors due to the Maillard reaction, which enhances the savory taste of the meat.
Advice on Handling Pizza Dough
1. After mixing your pizza dough, let it rest at room temperature for at least 30 minutes or until it doubles in size. This resting period allows the gluten to relax, making the dough easier to handle and shape without tearing.
2. When you’re ready to shape your dough, handle it gently. Avoid rolling it out with a rolling pin, which can deflate the dough. Instead, use your hands to gently stretch and press the dough into your desired shape. This method helps maintain the air pockets within the dough, resulting in a lighter, airier crust.
3. If you prefer a crispier crust, consider pre-baking your dough for 5-7 minutes before adding any toppings. This step can help prevent the dough from becoming soggy once the toppings are added, especially if you like a lot of sauce or toppings that release moisture.
4. Baking your pizza on a preheated pizza stone or steel can make a significant difference in the texture of the crust. These surfaces get very hot and mimic the environment of a professional pizza oven by evenly distributing heat and pulling moisture from the dough, creating a crispier crust.
Variations
1. Customizing Toppings:
Vegetarian Option: Swap the ground chicken for a combination of grilled vegetables like zucchini, bell peppers, and eggplant for a colorful and nutritious topping.
Spicy Kick: Add jalapeños or chili oil for those who like a bit of heat.
Meat Lover’s Delight: Along with ground chicken, add pepperoni slices and cooked bacon bits for extra indulgence.
Seafood Twist: Replace the ground chicken with shrimp and a sprinkle of dill for a seafood variation.
2. Gluten-Free or Low-Carb Crust Alternatives:
Gluten-Free Flour Mixes: Many stores offer gluten-free pizza dough mixes that can be used as a simple substitute for traditional flour.
Cauliflower Crust: For a low-carb alternative, try a cauliflower crust, which is not only gluten-free but also adds a serving of vegetables.
Almond Flour Crust: Another excellent low-carb option that adds a slightly nutty flavor to the crust.
Serving Suggestions
1. Sides
Garlic Bread: A classic side that pairs wonderfully with any pizza.
Caesar Salad: A fresh Caesar salad with crisp romaine lettuce, croutons, and creamy dressing can balance the hearty flavors of the pizza.
Antipasto Salad: For a lighter side, serve an antipasto salad with olives, pickled vegetables, and slices of salami.
2. Presentation Tips
Fresh Herbs: Sprinkle freshly chopped basil, parsley or dried oregano over the pizza right before serving to enhance its visual appeal and flavor.
Cheese Drizzle: Add an extra drizzle of a creamy sauce like ranch or blue cheese for a gourmet touch.
Serving Board: Serve the pizza on a wooden pizza peel or board for an authentic pizzeria look.
Why does pizza say u0022do not freezeu0022?
When you see u0022do not freezeu0022 on a pizza package, it usually relates to the quality and texture of the pizza after freezing and thawing. Freezing can affect the moisture content of the dough, toppings, and cheese. This moisture can turn into ice crystals, and when thawed, it can make the crust soggy and the toppings watery. Manufacturers might recommend against freezing to ensure that you experience the pizza as they intended, with optimal flavor and texture. However, many people do freeze pizza with satisfactory results, especially if they reheat it correctly, like using an oven instead of a microwave to restore some of the pizza’s original crispiness.
Can I store my pre-baked pizza crusts for later use?
Absolutely! Pre-baked pizza crusts are a fantastic option for quick and easy meals. You can store pre-baked crusts at room temperature for up to 1 week, in the refrigerator for up to 2 weeks, or freeze them for up to 3 months. When you’re ready to enjoy your pizza, simply add your favorite toppings and bake. Storing pre-baked crusts allows you to whip up a delicious homemade pizza anytime, with minimal prep and cooking time. Ensure your crusts are wrapped securely to maintain freshness and prevent any moisture loss or freezer burn if frozen.
Ground Chicken Pizza
Course: main coursesDifficulty: MediumServings
4
servingsPrep time
30
minutes1 hour 30 minutes
20 Minutes
Bake
Savor the crunch of freshly baked pizza dough topped with juicy, seasoned ground chicken, melted mozzarella, and vibrant capsicum. This recipe guides you through creating a delectable chicken pizza that’s perfect for any mealtime. Simple and straightforward, this dish combines classic flavors and fresh ingredients for a homemade pizza that’s sure to impress. Enjoy crafting this delicious pizza from the comfort of your kitchen.
Ingredients
Fresh pizza dough
Fresh pizza sauce
Seasoned ground chicken
Mozzarella cheese, shredded
Capsicum, sliced
Optional: onions, olives
Directions
- To prepare the pizza dough, start by combining the flour, yeast, salt, and sugar in a mixing bowl. Stir these dry ingredients together to ensure they’re evenly mixed. Next, add vegetable oil and half of a beaten egg to the bowl. Begin mixing these into the dry ingredients, gradually adding warm water as you stir to form a soft, pliable dough. Once the dough reaches the right consistency, cover the bowl and let it rest for 30 minutes. This allows the gluten to relax, making the dough easier to handle. After resting, divide the dough into portions and let them rise for another hour, giving the yeast time to work its magic and expand the dough. Before adding any toppings, pre-bake the shaped dough on a pizza stone or baking sheet in a preheated oven at 180°C for 5-7 minutes to ensure it becomes nicely crisp.
- To prepare the ground chicken topping, begin by heating oil in a pan over medium heat. Add sliced onions and sauté them until they become translucent. Next, incorporate garlic paste, ginger paste, and a bit of tomato sauce into the onions, allowing the mixture to cook for about 5 minutes to blend the flavors. Add the ground chicken to the pan, seasoning it with black pepper, paprika, and a pinch of salt. Continue cooking the mixture, stirring occasionally, until the water has fully evaporated and the chicken is thoroughly cooked through. This method ensures the chicken is flavorful and moist, perfect for topping your pizza.
- To create the pizza sauce, start by boiling tomatoes until they are soft enough to peel easily. Once peeled, puree the tomatoes in a blender to achieve a smooth consistency. Transfer this tomato puree to a saucepan, add tomato sauce, black pepper, chili flakes, salt, sugar, and paprika, and simmer the mixture until it thickens into a rich and flavorful pizza sauce.
- For assembling the pizza, begin by spreading a generous layer of the freshly made pizza sauce over your pre-baked crust. Evenly distribute the seasoned ground chicken and sliced capsicum across the sauce. Finish by sprinkling shredded mozzarella cheese over the top, and if you like, add some optional onions or olives for extra flavor and texture.
- Finally, bake the assembled pizza in a preheated oven at 180°C for 15-20 minutes. Monitor the baking process until the crust turns golden brown and the cheese melts into a bubbly, delicious topping. This final step will meld all the components together, resulting in a savory and visually appealing chicken pizza ready to be enjoyed.
Recipe Video
Notes
- After shaping the dough in the pizza mold, lightly prick it with a fork to ensure it sets well and prevents puffing during baking.
- Pre-bake the dough at 180°C for 5-7 minutes to create a crisp base that supports the toppings without becoming soggy.
- Distribute toppings evenly and generously apply mozzarella for optimal flavor and texture in every slice.
- Use a preheated pizza stone to achieve a perfectly crispy crust.
Final Words
Making this ground chicken pizza at home is both easy and delightful, offering a perfect blend of crispy crust, flavorful toppings, and melty cheese. It’s a versatile recipe that allows you to customize to your taste and dietary needs, ensuring everyone at the table can enjoy a slice or two.
I encourage you to try your own variations and share your experiences—whether you stick to the traditional methods or put a personal twist on it!
I’d love to see how your ground chicken pizza turns out! Please feel free to comment below with your results or any adjustments you made. Share your delicious creations on social media using #GroundChickenPizza and inspire others in your culinary community. Don’t forget to tag me so I can see all your amazing variations!
You May Also Like:
Please follow and like us:


